

User guide
Start with device preparation and pairing, then choose eye position or eye position + fusion measurement. Five steps take you through the test and the history lookup.
Detection edition workflow
Once the device is prepared and paired, choose either eye position measurement or eye position + fusion measurement. After the test, look up the results in the history.
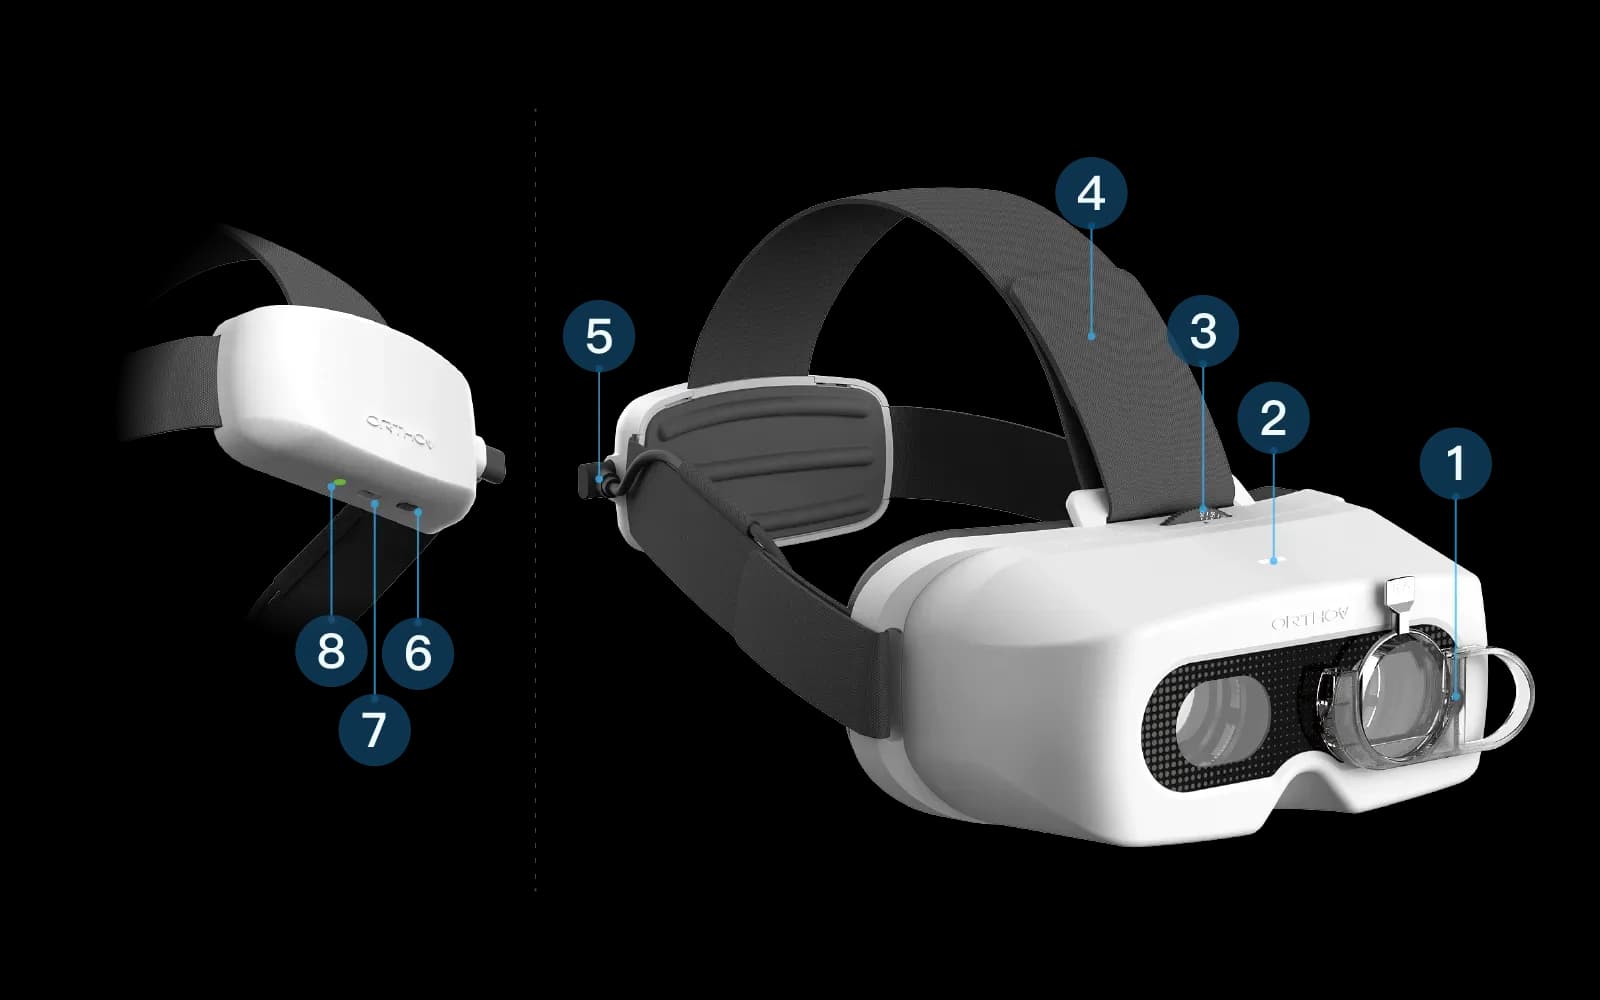
Device items
Lens holder: attaches the lenses needed for detection magnetically.
Main indicator light: shows standby, detection, data-receiving, or error status.
Adjustment knob: adjusts the distance between the left and right lens modules.
Head strap: adjustable to fit the person being tested.
Power cable: make sure the connection is secure before fitting the device.
Power button: press to power on; hold for 2 seconds to power off.
Charging port: connect a USB power cable to charge.
Battery indicator light: use it to check the current charge level and charging status.
Still no answer?
If the content above didn't address your question, contact our support team and we'll get back to you as soon as possible.