

User guide
Get started with your OrthoV visual training in five steps, from learning the device and initial setup to completing a training session.
Training version workflow
Select a step to view its detailed instructions. Images retain their full proportions on desktop and mobile.
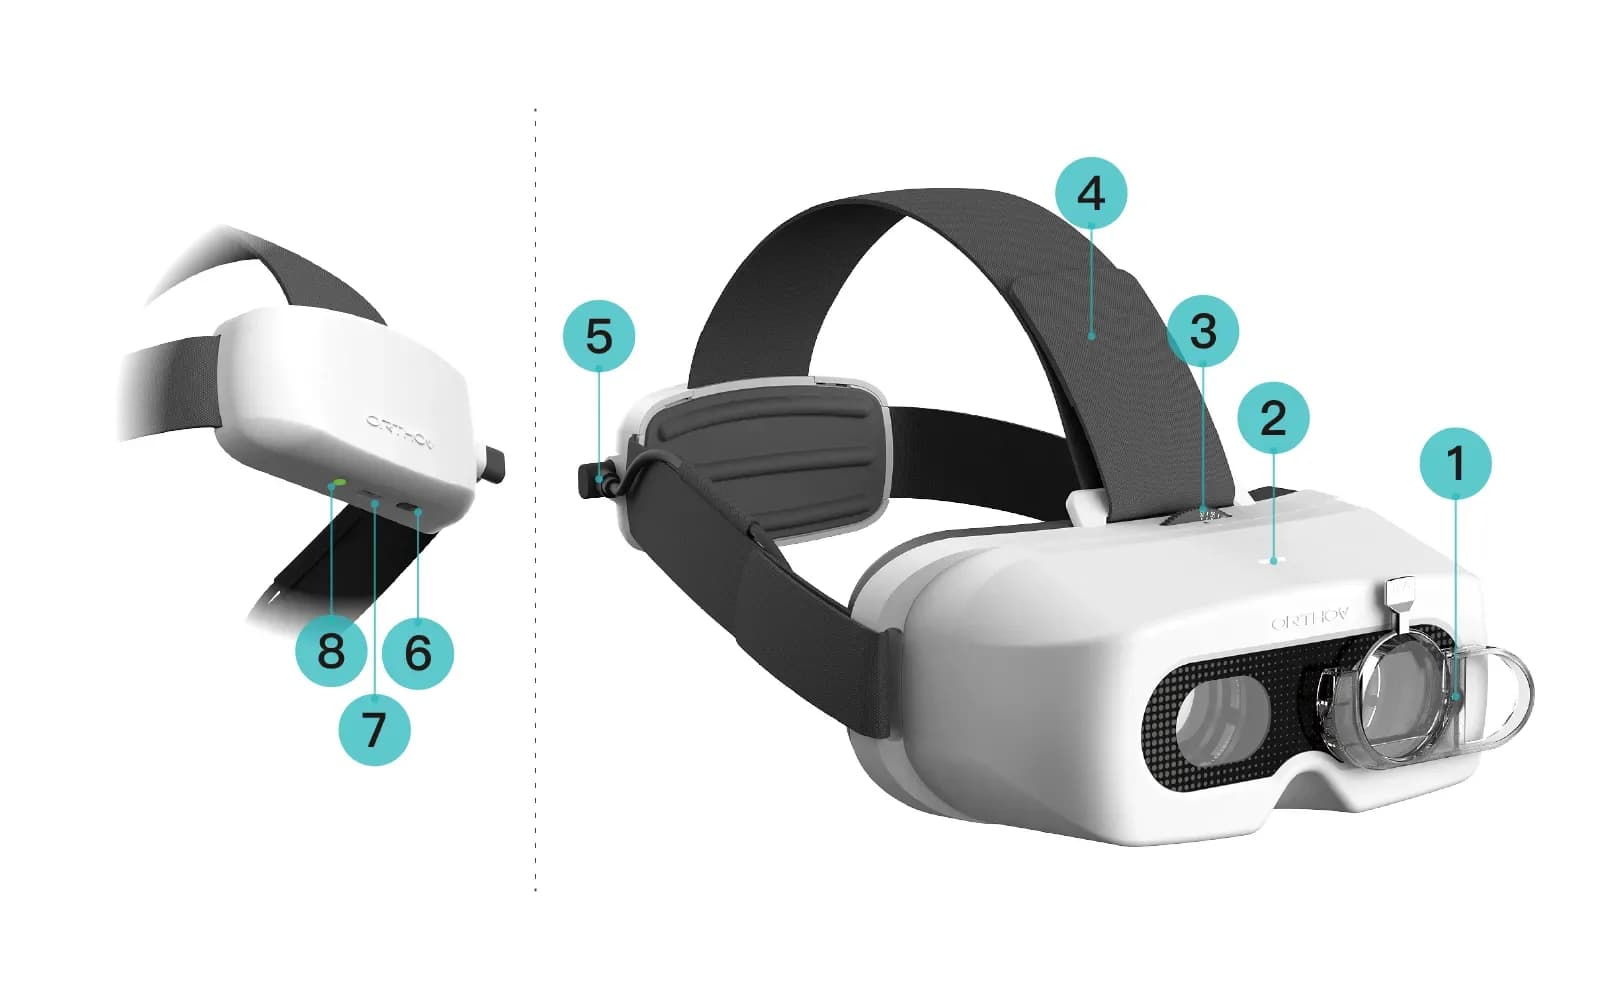
Device items
Main unit indicator light: Shows standby, training, data reception, or error status.
Adjustment knob: Adjusts the distance between the left and right lens modules.
Head strap: Adjusts to a comfortable and secure fit.
Power cable: Make sure the connection is secure before wearing the device.
Power button: Press to turn on; press and hold for 2 seconds to turn off.
Charging port: Connects the USB power cable for charging.
Battery indicator light: Shows the current battery level and charging status.
Still no answer?
If the content above didn't address your question, contact our support team and we'll get back to you as soon as possible.